




Startseite
-
Blog & Neuigkeiten
-
Existing Driver, Driver Modification, or New Driver? How to Check a Raspberry Pi CM4 MIPI DSI Panel Before Ordering
Existing Driver, Driver Modification, or New Driver? How to Check a Raspberry Pi CM4 MIPI DSI Panel Before Ordering
2026-08-06
00:00
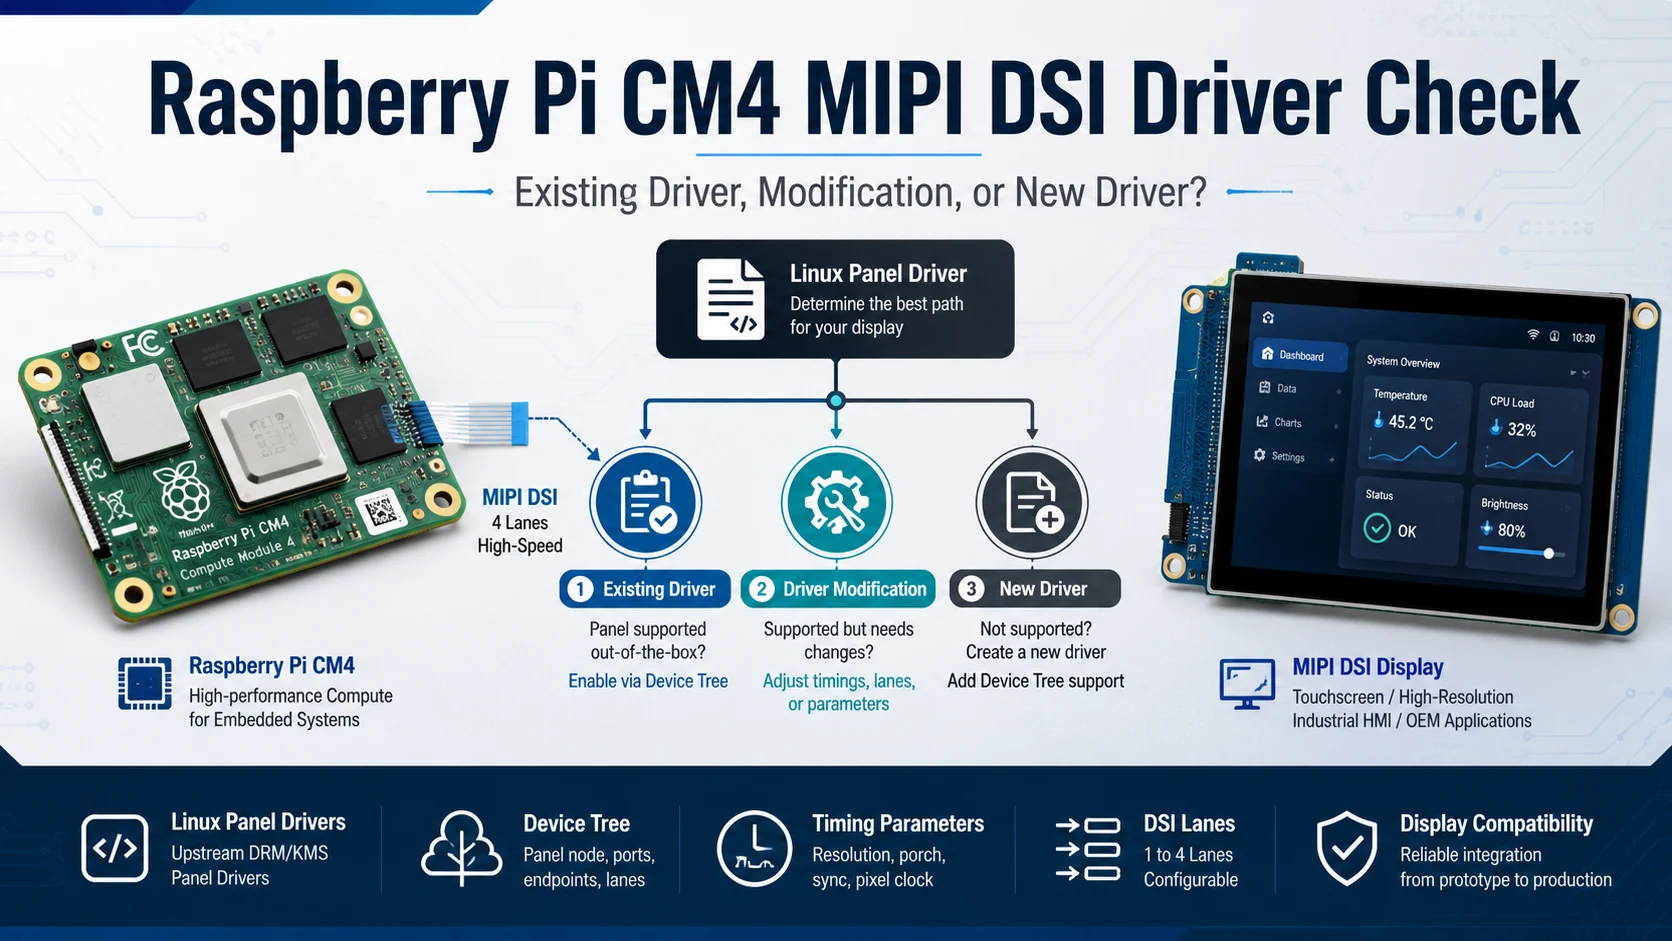
Before ordering a third-party MIPI DSI panel for Raspberry Pi CM4, determine whether Linux already supports the exact panel, whether an existing driver can be adapted, or whether a new DRM panel driver is required. A matching connector, resolution, or display-controller family is not enough to answer that question.
The decision depends on the panel model, initialization commands, complete timing, lane configuration, Device Tree binding, carrier-board connections, and separate touch-controller support. The public KD101QWU88FP-CM4 driver and Device Tree reference provides a useful example of the files and hardware information involved in a complete CM4 display integration package.
What Information Do You Need Before Checking Driver Support?
Driver feasibility cannot be evaluated from a product title such as “10.1-inch MIPI DSI display.” Start by collecting the exact panel and system information.
For the display, confirm:
-
Exact panel model
-
Display driver IC and revision
-
Active resolution
-
Complete horizontal and vertical timing
-
Pixel clock
-
Number of MIPI DSI data lanes
-
RGB pixel format
-
Video or command mode
-
Reset polarity
-
Power-on sequence
-
Initialization command table
-
Connector pinout
For the host system, confirm:
-
Raspberry Pi Compute Module model
-
Carrier-board model
-
Raspberry Pi OS release
-
Kernel version and architecture
-
Available DSI controller
-
DSI connector and FPC routing
-
Reset, enable, and backlight GPIOs
-
Touch controller and interface
The carrier board matters because the CM4’s processor capabilities do not prove that a specific DSI port, GPIO, or power circuit is available in the final product. Raspberry Pi’s own Compute Module display documentation distinguishes between DSI0 and DSI1 and requires the correct overlay and board-level connection for the selected port.
Path 1: When Can the Panel Use an Existing Linux Driver?
The lowest-risk path is an exact panel configuration already supported by the target Linux kernel or an available external module.
Search the kernel’s DRM panel drivers and any supplier-provided repository for:
-
The exact panel model
-
A matching compatible string
-
The same initialization sequence
-
Matching display timing
-
Matching lane count
-
Matching pixel format
-
Matching DSI mode flags
-
Matching reset and power behavior
An existing driver is useful only when it describes the actual panel. A driver for another display with the same resolution may define different porch intervals, pixel clock, lane configuration, or initialization registers.
Existing driver support also does not make the display plug-and-play. The project may still need a Device Tree overlay that selects the correct DSI controller, creates the panel node, assigns GPIOs, and connects the host and panel endpoints.
Raspberry Pi loads hardware-specific Device Tree overlays through dtoverlay entries in its boot configuration. That hardware description is separate from the panel behavior implemented by the Linux driver.
Pre-Order Decision
Classify the panel as ready for sample ordering after board-level checks when:
-
The exact panel configuration is supported.
-
The required driver can be built or enabled for the target kernel.
-
The initialization commands and timing match.
-
The carrier-board DSI path and GPIO assignments are known.
-
The supplier provides the required display and touch information.
This conclusion means the software path appears feasible. It does not replace physical and complete-system validation after the sample arrives.
Path 2: When Does an Existing Driver Need Modification?
A driver modification is appropriate when the existing code architecture is relevant but one or more panel-specific parameters differ.
Common changes include:
-
Horizontal or vertical timing
-
Pixel clock
-
Initialization command table
-
Lane count
-
RGB565, RGB666, or RGB888 format
-
DSI video-mode flags
-
Reset GPIO or polarity
-
Power-on delays
-
Panel orientation
-
Physical panel dimensions
It is important to distinguish a board adaptation from a panel-driver modification.
Ein Device Tree-only change may be sufficient when the panel driver and initialization already match, but the carrier board uses a different DSI port, reset GPIO, regulator, or endpoint connection.
Ein C driver change is more likely when the panel uses different timing, initialization commands, lane settings, operating mode, or power lifecycle.
Linux DRM panel helpers separate operations such as preparing, enabling, disabling, and unpreparing a panel. They also provide the panel’s display modes to the rest of the DRM subsystem. Changes to timing or lifecycle behavior therefore belong in the driver rather than being treated only as Device Tree properties.
Pre-Order Decision
Classify the panel as order only after the modification scope is confirmed when:
-
A suitable driver exists but does not exactly match the panel.
-
The required source files are available.
-
The missing timing and initialization data can be obtained.
-
Responsibility for modifying and validating the driver is clear.
-
The project team understands that a kernel update may require rebuilding an external module.
Do not estimate the engineering work from resolution or controller name alone.
Path 3: When Is a New Panel Driver Required?
A new Linux DRM panel driver may be required when the kernel has no matching panel description and no existing driver provides a suitable foundation.
Warning signs include:
-
No matching panel or compatible configuration exists.
-
The supplier cannot provide initialization commands.
-
The panel uses a different command or video mode.
-
The power and reset sequence differs substantially.
-
The required display timing cannot be represented by an existing panel description.
-
The display driver IC or register sequence is unsupported.
-
There is no known method to bind the panel to the DSI host.
A new panel driver normally needs to define:
-
Panel probe and resource acquisition
-
Complete display mode
-
Lane count
-
Pixel format
-
DSI mode flags
-
Initialization commands
-
Power and reset operations
-
Prepare, enable, disable, and unprepare behavior
-
MIPI DSI attachment
-
A matching Device Tree binding or overlay
The public CM4 reference repository illustrates this broader scope. It contains a panel driver directory, a DSI overlay, touch-related files, and instructions for compiling and installing .ko and .dtbo outputs. Its README identifies a 10.1-inch, 1200 × 1920 HX8279 and GT928 configuration and describes deployment to a CM4 system.
Pre-Order Decision
Classify the panel as do not order until driver feasibility is established when:
-
Initialization data is missing.
-
No reusable driver exists.
-
The responsible engineering team has not reviewed the panel.
-
Hardware pinout and power requirements remain unclear.
-
Software development ownership is undefined.
Ordering a panel before these questions are answered can turn an inexpensive sample into a larger redesign task.
Panel Driver, Device Tree, and Touch Driver: Which One Do You Need?
The three components solve different problems.
| Component | Main responsibility | Typical reason for change |
|---|---|---|
| Panel driver | Timing, initialization, lanes, pixel format, and panel lifecycle | The panel configuration or controller behavior changes |
| Device Tree overlay | DSI host, panel node, GPIOs, regulators, and endpoints | The carrier board, DSI port, or GPIO assignment changes |
| Touch driver and node | I²C or USB communication, interrupt, reset, and input events | The touch controller or board-level touch connection changes |
Touch support should be evaluated separately from display support. A MIPI DSI image path can work while the touchscreen remains unavailable because the touch controller uses a separate I²C or USB connection.
In the public KD101QWU88FP-CM4 project, the display and touch resources are organized separately. The repository describes an HX8279 display configuration and GT928 touch, while the associated product page lists MIPI DSI for display and I²C for touch.
Driver Support Does Not Confirm Complete Display Compatibility
A usable driver is one requirement, not a complete compatibility result.
The physical connection must still match:
-
Connector pitch and contact direction
-
FPC pinout
-
Clock and data-lane mapping
-
Cable length and routing
-
Adapter-board design
The electrical interface must also match:
-
Lane count and supported lane rate
-
Display timing and pixel clock
-
Panel and I/O voltages
-
Reset and enable signals
-
Backlight supply
-
Power sequence
After sample delivery, validate:
-
Cold boot
-
Restart
-
Image stability
-
Backlight control
-
Touch input and coordinate mapping
-
Suspend and resume
-
Enclosure clearance
-
FPC bend and connector access
A connector that physically fits does not prove that lane assignments, voltage pins, timing, software, or touch support are compatible. Kadi’s existing Raspberry Pi MIPI DSI touchscreen troubleshooting guide also separates power, FPC, timing, Device Tree, driver, and I²C touch checks when diagnosing a failed integration.
Use a Three-Level Driver Decision Before Ordering
Use the following decision logic:
Existing Driver Available
Choose this path when the exact panel configuration, timing, initialization, lane count, and DSI mode are already supported.
Action: confirm the carrier-board connection and Device Tree requirements, then order a sample for system validation.
Driver Modification Required
Choose this path when the driver architecture is reusable, but the timing, initialization, GPIOs, orientation, lane configuration, or mode flags differ.
Action: define the required source changes, technical files, responsibilities, and validation plan before ordering.
New Driver Required
Choose this path when there is no compatible driver or the necessary initialization and panel information is missing.
Action: pause the purchase until software feasibility and development ownership are clear.
This framework helps both engineers and procurement teams distinguish “a display exists” from “the display can be integrated into the intended CM4 product.”
Standard Module, Modified Assembly, or Modular Solution?
A platform-ready module is suitable when the display, converter board, touch controller, driver, and overlay already fit the project. Kadi’s MIPI DSI displays for Raspberry Pi category includes TFT and touchscreen modules across multiple sizes, resolutions, brightness levels, and touch interfaces for Raspberry Pi-oriented integration.
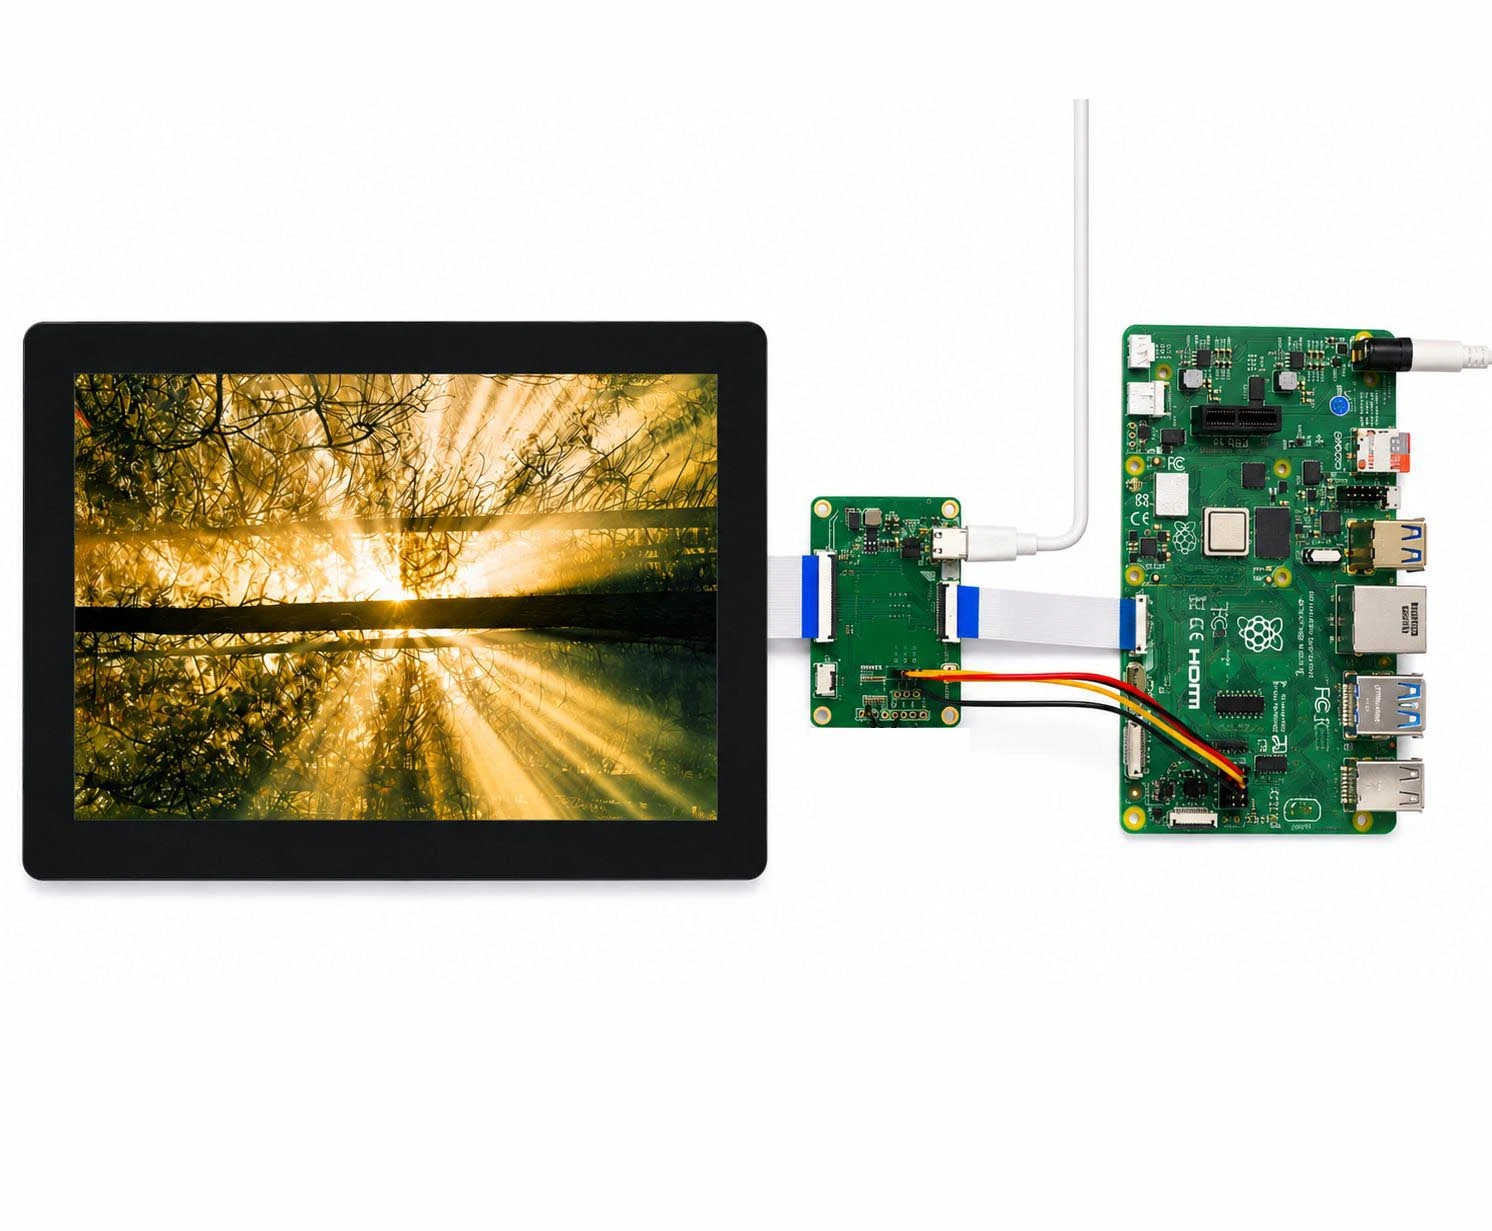
Die 10.1-inch 1200×1920 MIPI DSI touchscreen for Raspberry Pi CM4 is a relevant example because its page describes a converter board, MIPI DSI and I²C connections, kernel compilation, and installation of driver and overlay files. Those published resources apply to that product configuration and should not be assumed for every MIPI DSI module.
A modified or custom display assembly may be more appropriate when the CM4 platform is fixed but the device requires:
-
A different FPC or pinout
-
A custom converter board
-
Higher brightness
-
Different touch or cover glass
-
Mechanical adaptation
-
Modified timing, overlay, or panel driver
When a product team does not want to maintain an external kernel driver, a controller-based or modular display solution may reduce low-level integration work. Kadi Anzeige presents Raspberry Pi modules, embedded displays, controller accessories, and customized display options that can support different integration levels rather than limiting a project to a bare TFT panel.
What Should You Request Before Ordering?
Ask the display supplier for:
-
Exact panel model
-
Display driver IC
-
Complete panel datasheet
-
Horizontal and vertical timing
-
Pixel clock
-
Initialization command table
-
Lane count
-
Pixel format
-
DSI operating mode
-
Reset and power sequence
-
Connector and pinout
-
Reference panel driver
-
Device Tree or overlay example
-
Supported kernel or Raspberry Pi OS version
-
Touch controller and driver information
-
Adapter-board documentation
-
Mechanical drawing
If key files are unavailable, treat that absence as part of the technical risk rather than assuming the information can be reconstructed after purchase.
Schlussfolgerung
Before ordering a Raspberry Pi CM4 MIPI DSI panel, classify its software path as an existing driver, a driver modification, or a new driver. A matching connector, controller family, or resolution does not independently prove compatibility.
An existing driver still requires correct Device Tree and board-level configuration. A modified driver requires a defined scope for timing, initialization, lanes, and lifecycle changes. A new-driver project should not proceed until initialization data, hardware information, and engineering ownership are established.
To review a candidate panel, use discuss CM4 display driver requirements before ordering and provide the Compute Module and carrier-board models, Raspberry Pi OS and kernel versions, panel model, driver IC, complete timing, initialization files, lane count, connector pinout, touch-controller information, application, and expected quantity.
Häufig gestellte Fragen
Do I Need a Custom Driver for Every Third-Party MIPI DSI Panel?
No. An existing Linux driver may be usable when it supports the exact panel configuration. Otherwise, the project may need a modified driver or a new panel driver.
Is a Device Tree Overlay Enough to Enable a New MIPI DSI Panel?
It may be enough when the kernel already contains a matching panel driver. An overlay describes the hardware connection but does not replace missing timing, initialization, or lifecycle logic.
Can Two Panels with the Same Driver IC Use the Same Driver?
Not necessarily. They may use different timing, initialization commands, lane configurations, pixel formats, reset behavior, or power sequences.
Does the Touchscreen Need a Separate Driver?
Usually, yes. The MIPI DSI connection carries the image, while touch commonly uses I²C or USB and requires a separate controller driver and hardware description.
Should I Order a Panel Before the Initialization Commands Are Available?
That creates significant integration risk. Confirm the initialization table, panel timing, driver path, connector pinout, and responsible engineering resources before ordering.
Vorherige
How to Read a MIPI DSI Timing Table: Pixel Clock, Porches, Sync Width, and Refresh Rate
Nächster
Industrial Display Stack-Up Design: Integrating LCD, Touch, PCB, FPC, and Enclosure
Hinterlasse einen Kommentar

Neueste Blog & Nachrichten
- MIPI DSI Display Works at Room Temperature but Fails After Warm-Up: A Troubleshooting Workflow
- LCD Prototype Passed but Pilot Units Fail: A Display Integration Isolation Workflow
- VESA vs JEIDA LVDS Mapping: Evidence-Based Color Diagnosis and Release
- eDP LCD Panel Integration: Power, AUX, Link Training, Video and Backlight
- How to Choose an LCD Controller Board: Architecture, EDID, Timing and Latency

