Cómo configurar un 10″ Pantalla táctil LCD para Raspberry Pi
2025-09-26
00:00
Comprender los requisitos de hardware
Descripción general de los modelos Raspberry Pi compatibles
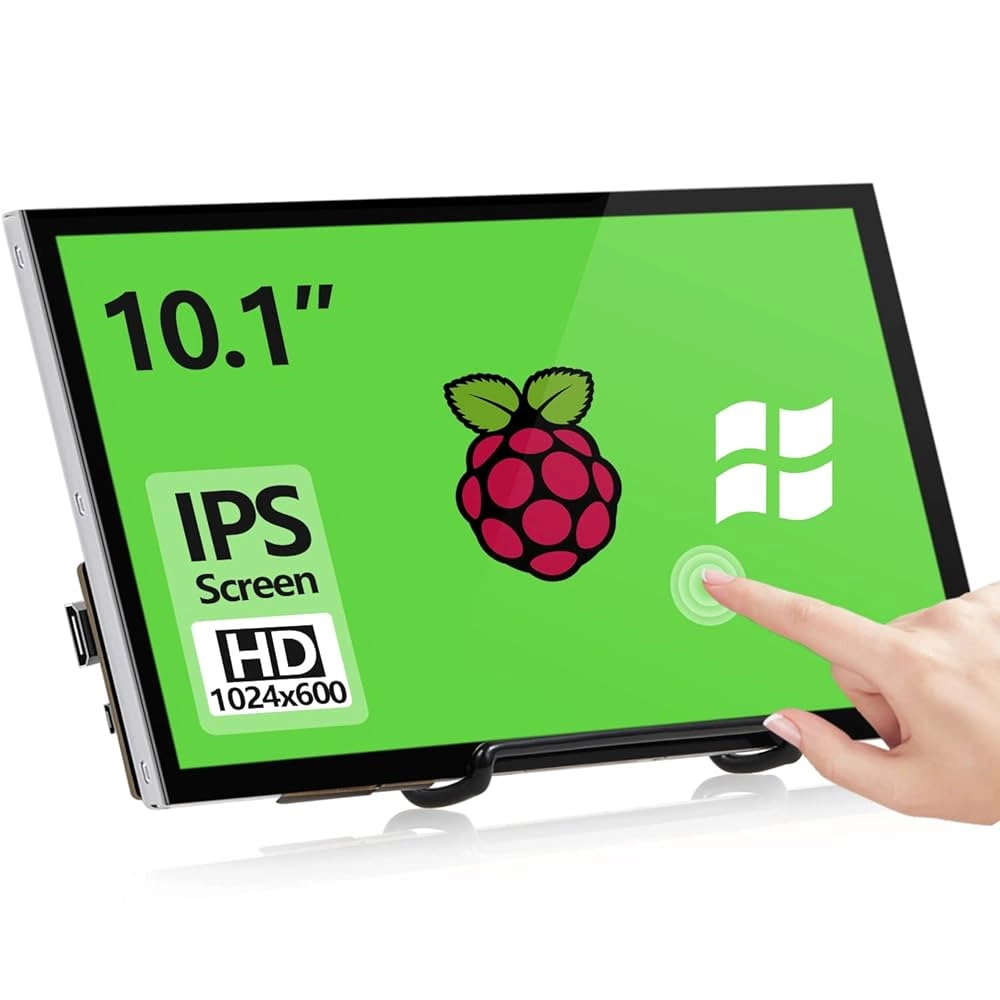
Para obtener una 10″ pantalla táctil LCD Trabajar con una Raspberry PiDebes elegir el tablero correcto. Muchas versiones más nuevas de Raspberry Pi como el Raspberry Pi 3B, 3B, 4B e incluso el Zero W funcionan bien porque tienen salida HDMI y puertos USB para funciones de pantalla y táctil. Estas placas son excelentes para conectar pantallas externas gracias a sus pines GPIO y ranuras de conexión regulares.
Características de un 10″ Pantalla táctil LCD
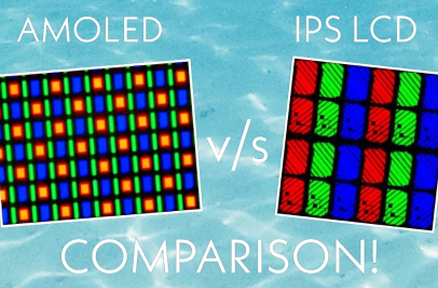
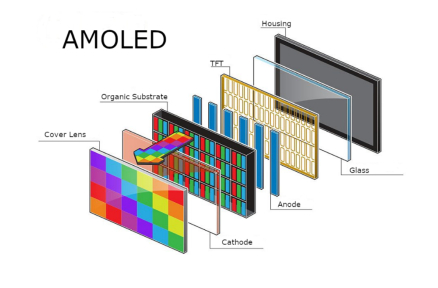
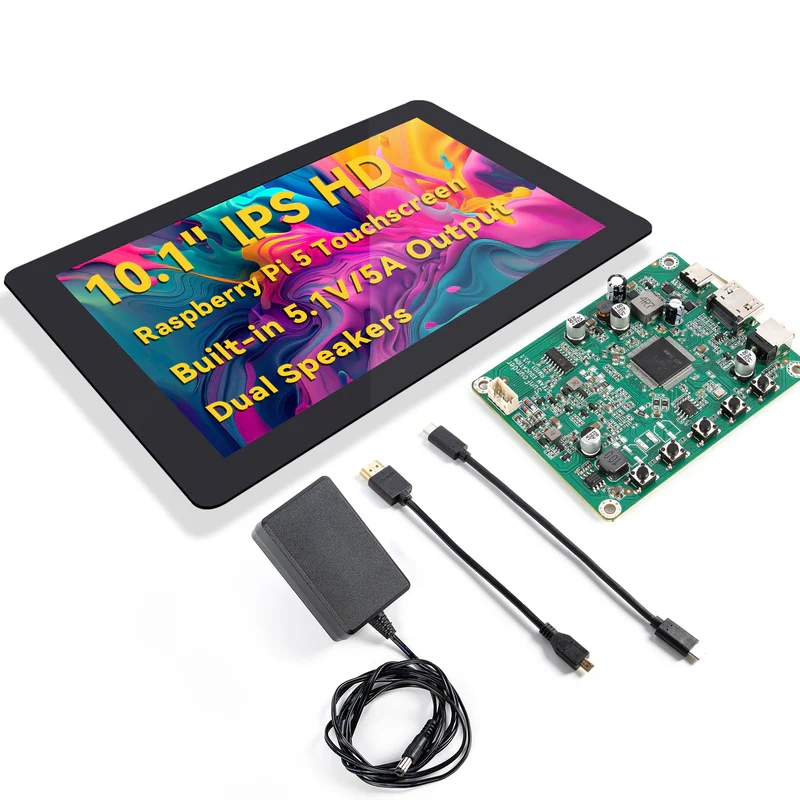
Un buen 10.1 pulgadas pantalla táctil generalmente tiene una imagen clara con resoluciones entre 1280×800 y 1920×1200 píxeles. A menudo utiliza la tecnología IPS para colores brillantes y amplios ángulos de visión. El LCD TFT IPS ofrece un ángulo de visión de hasta 178 grados, por lo que la imagen se mantiene nítida y colorida desde casi cualquier punto. Gran calidad de color y construcción resistente que puede manejar algunos golpes y presión hacen que estas pantallas sean perfectas para proyectos prácticos. Muchos también soportan multitáctil, recogiendo hasta diez dedos a la vez.
Cables y accesorios necesarios
Para vincular tu LCD al Raspberry Pi, necesitarás algunas cosas:
-
Un cable HDMI para la alimentación de vídeo.
-
Un cable USB o configuración GPIO para señales táctiles.
-
Un adaptador de alimentación, a menudo alrededor de 12V / 1.5A.
-
Soportes o una carcasa para montaje.
Esa placa de controlador también viene con un adaptador de alimentación que empuja 12V a 1500Ma, lo que también puede alimentar al Pi. Esto reduce los cables desordenados ya que ambos dispositivos pueden usar la misma fuente de energía.
Preparando el Raspberry Pi para la integración LCD
Instalación del sistema operativo en Raspberry Pi
Primero, coloque el sistema operativo Raspberry Pi en una tarjeta microSD con una herramienta como Raspberry Pi Imager o Balena Etcher. Pon la tarjeta en tu Pi. A continuación, inicie con un teclado y un ratón conectados.
Actualización de firmware y paquetes de software
Después de iniciar el sistema operativo Raspberry Pi, abra una terminal y escriba:
sudo apt actualización & & sudo apt actualización completa -ysudo rpi-actualización
Esto asegura que su sistema tenga las actualizaciones más recientes y controladores para conectar cosas como pantallas.
Configuración de la configuración de pantalla en el sistema operativo Raspberry Pi
Si su pantalla no se ve bien por sí sola, ajuste el archivo /boot/config.txt. Solo escribe:
sudo nano /boot/config.txt
Agregar o cambiar estas líneas si es necesario:
hdmi_group=2hdmi_mode=87hdmi_cvt=1280 800 60 6 0 0
Guardalo y reinicie el Pi.
Conectando el 10″ Pantalla táctil LCD para el Raspberry Pi
Conexiones HDMI y de alimentación
Conecte un lado del cable HDMI en la ranura HDMI de su Raspberry Pi. Conecte el otro lado a la placa de control que viene con su pantalla. Después, conecte la fuente de alimentación. Eso no es un Raspberry Pi, es la placa de control incluida que funciona con tu pequeña computadora.
Usando GPIO o USB para entrada táctil
La mayoría de las pantallas táctiles envían información táctil a través de USB. Conecte un cable USB desde la placa del controlador de la pantalla a una ranura USB en su Raspberry Pi. Algunas pantallas pueden usar GPIO para la entrada. Pero USB es más fácil ya que es principalmente plug-and-play.
Consideraciones de montaje y configuración física
La pantalla a menudo tiene orificios o soportes de montaje compatibles con VESA. Tiene agujeros de montaje en la parte trasera para cualquier Raspberry Pi o LattePanda o Beagle Bone. Puede fijarlo en una pared, en un soporte o incorporarlo en una caja personalizada utilizando piezas de diseños CAD o opciones listas.
Configuración de la funcionalidad de la pantalla táctil
Habilitar el soporte táctil en el sistema operativo
La entrada táctil a través de USB generalmente funciona inmediatamente en las versiones más recientes del sistema operativo Raspberry Pi. Para comprobar si ha sido recogido, escriba:
lsusb | grep -i toque
Si lo ves en la lista, no necesitas conductores adicionales.
Calibrar la pantalla táctil para obtener precisión
Para hacer el toque más preciso, instale xinput-calibrator. Tipo:
sudo apt instalar xinput-calibratorxinput_calibrator
Siga los pasos en la pantalla para alinear correctamente los puntos de contacto.
Solución de problemas comunes de entrada táctil
Si el tacto no funciona, prueba estos pasos:
-
Asegúrese de que el cable USB esté conectado bien.
-
Mira los registros de dmesg para ver si el dispositivo aparece.
-
Cambia a una ranura USB diferente.
-
Actualice todo escribiendo sudo apt update & & sudo apt actualización.
Optimización del rendimiento y la usabilidad de la pantalla
Ajustar la resolución y la orientación de la pantalla
Ir a raspi-config en Opciones de pantalla > Resolución para establecer la resolución correcta. Para una vista de retrato, edite /boot/config.txt de esta manera:
display_rotate=1 # (90°)display_rotate=2 # (180°)display_rotate=3 # (270°)
Gestionar el consumo de energía con pantallas más grandes
Las pantallas más grandes necesitan más energía. Asegúrese de que su fuente de alimentación sea lo suficientemente fuerte, al menos 12V / 1.5A. También puede reducir el brillo de la luz de fondo a través del software si su placa de controlador lo permite.
Personalización de la interfaz de usuario para la navegación táctil
Instale un teclado de pantalla como Matchbox. Solo escribe:
sudo apt instalar matchbox-teclado
Una vez que’ he instalado matchbox-teclado que’ Lo encontrarás en Menú principal, Accesorios, Teclado. Esto es útil para configuraciones sin un teclado real conectado.
Prueba y verificación del éxito de la configuración
Ejecución de herramientas de diagnóstico para pantalla y entrada táctil
Prueba la pantalla con herramientas como glxgears o reproduciendo un vídeo HD en el reproductor VLC. Para comprobar la entrada táctil, escriba:
/dev/input/eventX
Intercambio eventX con el nombre correcto del dispositivo desde /dev/input.
Inicio de aplicaciones para confirmar la funcionalidad completa
Intenta abrir el navegador Chromium o aplicaciones de interfaz gráfica Python simples con Tkinter / Kivy. Vea cómo se ve la pantalla y cómo responde el tacto a través de diferentes botones y menús.
Consejos adicionales para el uso a largo plazo
Proteger su pantalla de daños o desgaste
Usa un protector antirreflejos o prueba la unión óptica si es posible. La unión óptica es un método que implica la unión de TFT LCD y CTP utilizando materiales ópticos. Este proceso hace que la pantalla funcione mejor y más fácil de leer al deshacerse de los huecos de aire para reducir el rebote de luz.
El uso de carcasas o soportes para una mejor ergonomía
Piensa en conseguir soportes o soportes de pared compatibles con VESA para proyectos con pantallas como esta. Hace que las cosas sean más fáciles de usar y mantiene el interior a salvo del polvo o los golpes durante el uso.
Mantener el software actualizado para la compatibilidad continua
De vez en cuando, actualice su sistema. Tipo:
sudo apt actualización & & sudo apt full-upgrade -y & & sudo rpi-actualización
Esto mantiene las cosas funcionando con actualizaciones futuras que podrían afectar la salida HDMI o dispositivos USB como pantallas táctiles capacitivas.
Preguntas frecuentes
P: ¿Puedo usar esta pantalla con otros dispositivos además de Raspberry Pi?
También puede usarlo para básicamente cualquier cosa que pueda salir HDMI, por lo que puede ser un pequeño monitor / pantalla portátil para Android o iOS.
P: ¿Se admite multitáctil?
Tiene 10 dedos multitouch que es fabuloso.
P: ¿Qué pasa si no quiero un teclado externo?
También hay un paquete de teclado de pantalla táctil matchbox opcional que puede instalar para obtener un teclado visual en pantalla.
Personalizado 10″ Pantalla táctil LCD para Raspberry Pi de Kadi Display
Kadi Display tiene soluciones especiales hechas solo para sistemas como los que usan tablas Raspberry Pi. Ofrecen una pantalla TFT LCD de grado industrial de 10,1 pulgadas 1280 × 800 con CTP, que viene en configuraciones con interfaces LVDS y paneles multi-táctiles capacitivos.
Kadi Display ofrece opciones personalizadas completas como vidrio de cubierta como su solicitud: LOGO / Color / Forma / Espesor, cambio de brillo de retroiluminación, ajuste de pinouts, selección de tipos de interfaz (HDMI / USB / MIPI), diseño de FPC / cable, creación de carcasas y oferta de unión óptica para uso difícil en entornos industriales.
Con más de 20 años en la producción de LCM/TP/BONDING y una fábrica de más de 5.000 metros cuadrados, Kadi Display tiene un profesional de I+amp; Equipo D responsable de las placas adaptadoras de señal. Esto garantiza una conexión suave entre pantallas personalizadas y plataformas como Raspberry Pi. Contacto con Kadi Display para más información y cita.
PREVIOR
Cómo se usan los monitores de pantalla táctil de marco abierto para la automatización industrial de HMI
Siguiente
¿Cuál es el puerto MIPI DSI en Raspberry Pi y cómo se utiliza?
Deja un comentario