


Что нужно знать перед покупкой сенсорного экрана Raspberry Pi
2025-12-18
11:50
Смешивание сенсорных панелей с досками Raspberry Pi изменило малые вычисления. Он создает небольшие, практические системы для обучения, создания прототипов и фабричного использования. Это руководство охватывает основы ЖК сенсорных экранов Raspberry Pi. Он переходит от простых идей к настройке реального мира. Цель состоит в том, чтобы помочь покупателям сделать разумный выбор для кодеров и строителей.
Что такое сенсорный экран Raspberry Pi?
Семья Raspberry Pi началась в команде между Фондом Raspberry Pi и Broadcom в Великобритании. Это крошечные одноплатные компьютеры (SBC), сделанные в основном для повышения уроков информатики в школах и бедных районах. Первые модели, такие как Raspberry Pi 1, вышли рано. Вскоре они распространились за пределы классных комнат. Люди использовали их в роботах, умных устройствах и метеостанциях. Причинами являются низкая стоимость, простой обмен деталями и дизайн с открытым исходным кодом.
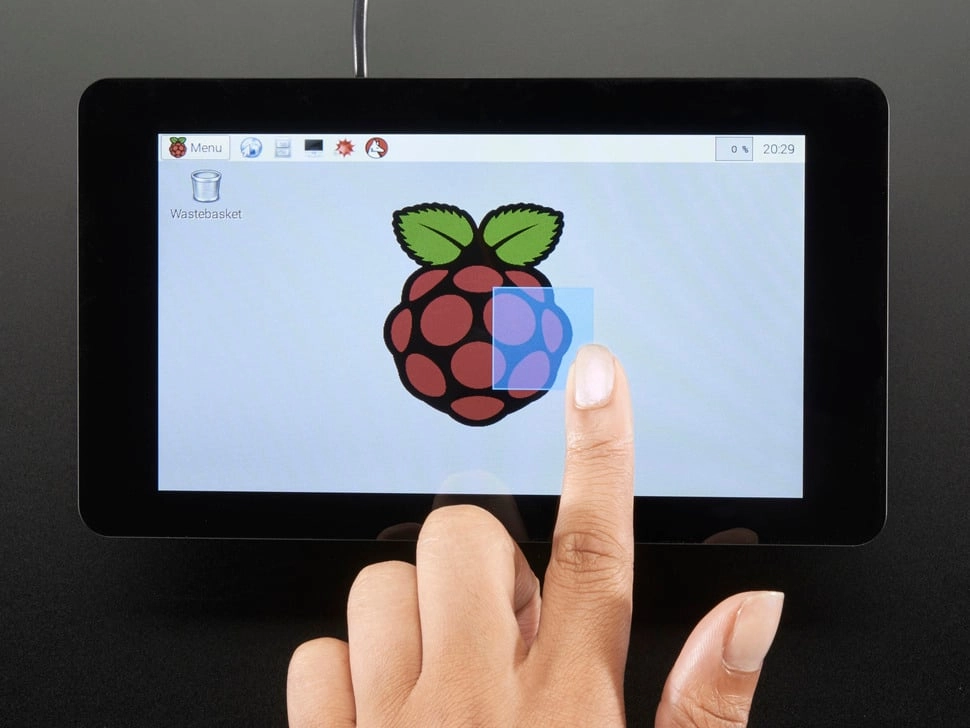
А Raspberry Pi сенсорный экран ЖК это сенсорный экран модуля. Он связан прямо с Raspberry Pi’ с шпильки GPIO, порт DSI или выход HDMI. Это превращает SBC в устройство с сенсорным управлением. Эти экраны следуют общим правилам, таким как HDMI и USB. Хобби-фанаты и профессионалы обоим нравятся.
Стандартные мониторы большие и требуют много энергии. Но сенсорные ЖК-экраны Raspberry Pi небольшие, часто от 3,2 до 7 дюймов. Они используют мало энергии. Это вписывает их в мобильные проекты без проблем. Их гибкость исходит от Raspberry Pi’ Медиаинструменты. Пользователи создают медиаплееры или сенсорные кабины.
Ключевыми плюсами являются лучший контакт с пользователем через мульти-сенсорный. Они работают со всеми типами Raspberry Pi, от старой модели A/B до мощного Raspberry Pi 5. Экраны показывают фотографии и уловляют прикосновения. Это позволяет управлять прокладкой, необходимой сегодня’ Малые системы.
Как работает Raspberry Pi?
Raspberry Pi действует как полный компьютер на одной плате. У него есть чип ARM, встроенная оперативная память и хранилище, которое растет с картами microSD. Добавление сенсорного экрана ЖК происходит в основном через разъем DSI. Это быстрый лентовый кабель. Он отправляет видео и сенсорные данные с низкой задержкой.
Ссылка DSI соединяет экран прямо к Pi’ с чипом. В большинстве случаев не требуются дополнительные детали. Эта настройка позволяет работать HDMI одновременно. Пользователи получают два экрана для исправления ошибок или больших рабочих зон. Для старых устройств, таких как Raspberry Pi 1 Model A или B, установка требует небольших изменений. Пользовательские держатели соответствуют дисплею’ с HAT противостояния.
Помощь Совету
Каждый тип Raspberry Pi — от крошечной линии Zero до мощных Pi 4 и 5 — обрабатывает экраны DSI. Однако старые доски, такие как модели А и В, пропускают встроенные отверстия. Людям нужны 3D-печатные опоры или клейкие фиксации, чтобы держать дисплейную доску. Новые, такие как Pi 5, имеют лучшие порты DSI. Они управляют более высокими деталями до 1080p при 60 Гц. Обновления от Raspberry Pi Foundation позволяют легко использовать плагин. Тем не менее, небольшие изменения ядра могут улучшить скорость для определенных размеров экрана.
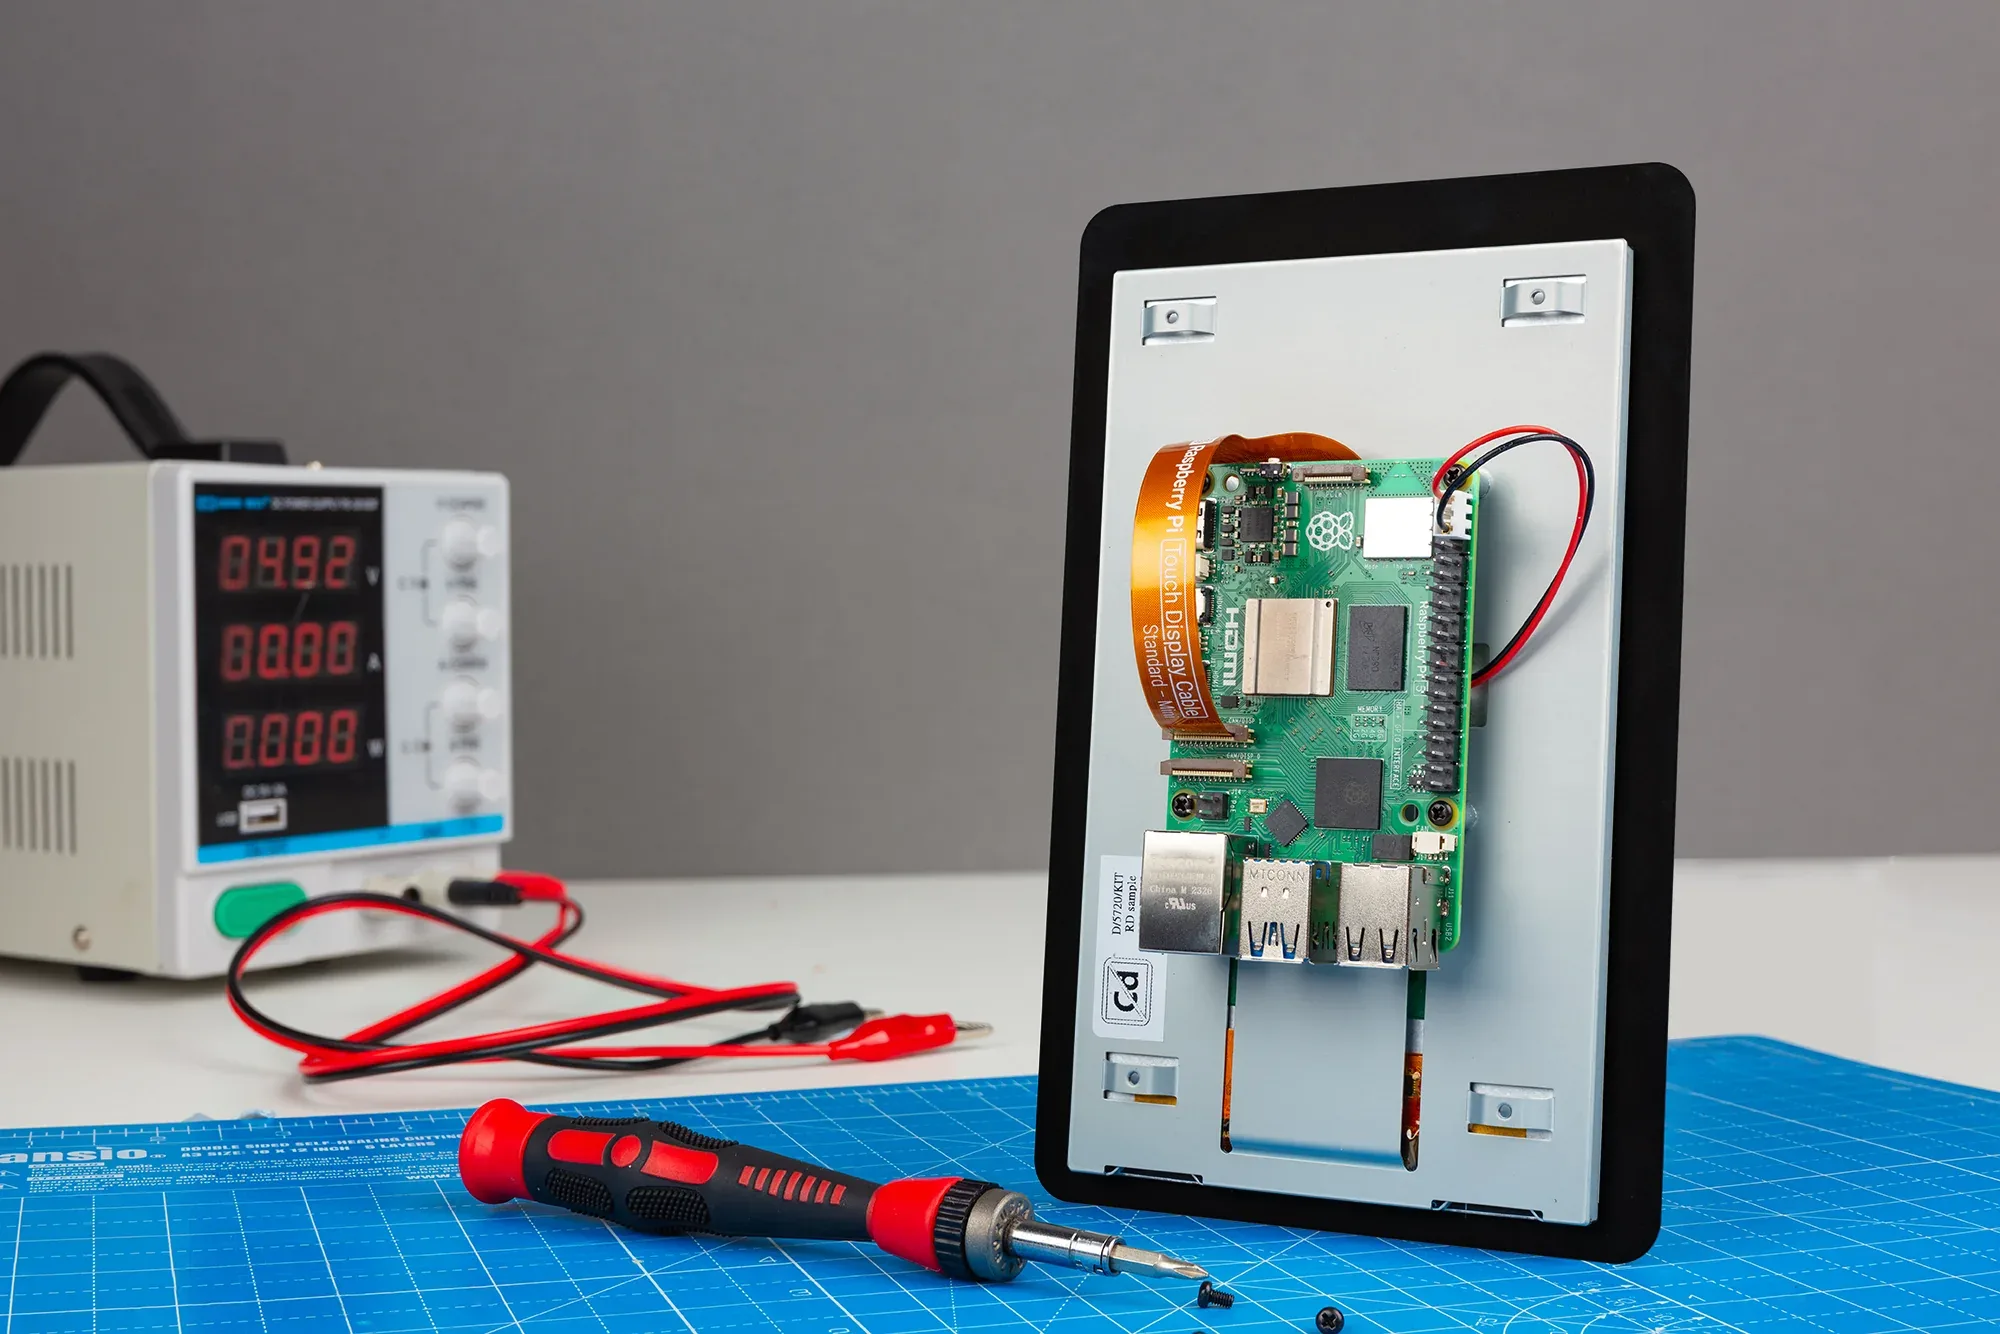
Физическая установка
Настройка проста. Подключите лентовый кабель для данных и питания DSI. Добавьте проводы для 5V и GND. Красные и черные проводы с экрана’ s линия питания идти к Pi’ с соответствующей GPIO пятна. Это поддерживает напряжение стабильным. Для задней установки доски на экран, резкие винты блокируют части на месте. Ключ к уходу при размещении лентового кабеля. Это позволяет избежать проблем с сигналом. Плохой подход может вызвать меркание экрана или неправильные прикосновения.
В свободных настройках экран работает в одиночку. Три неиспользованных штифта на старых моделях остаются свободными. Старые документы поддержки из Raspberry Pi Foundation перечисляют настройки прыжка для моделей A и B. В них подчеркивается безопасность ESD при прикосновении к деталям.
Ориентация дисплея
Хорошие потребности просмотра соответствуют LCD’ с световый фильтр к углу настройки. ЖК-экраны Raspberry Pi с сенсорным экраном начинаются в ландшафте для использования на столе. Лучший угол - 0-45 градусов сверху. Для перевернутых подъемов, таких как стенные кабины, линии программного обеспечения в config.txt поворачивают выход на 180 градусов. Это исправляет тягу жидких кристаллов от гравитации. Изменение сохраняет цвета истинными и резким контрастом. Это важно в разных условиях.
Что нужно знать перед покупкой сенсорного экрана Raspberry Pi
Raspberry Pi 4 и более поздние модели открыли вычисления SBC для многих. Экраны делают вещи портативными. Выбор правильного сенсорного ЖК-экрана означает соответствие потребностей проекта техническим деталям. Это обеспечивает годность и долгую жизнь.
Размер экрана
Размер измеряется в дюймах. Она определяет, насколько легко носить и видеть. Небольшие 3,2-дюймовые панели подходят для носимых предметов или летающих ботов. 7-дюймовые блестят в панелях управления. Большие до 10,1 дюйма справляются со сложными меню. Но они используют больше энергии и добавляют вес. Размер проекта руководства выбрать: школьные наборы, как 5-дюймовые для удобного использования.
Яркость экрана
Яркость использует cd/m² или ниты. Он показывает выход света внутри или снаружи. Нормальный 200 cd/m² работает в комнатах. Заводу нужны 400-1000 cd/m², чтобы побеждать солнечное сияние. Антислирные слои повышают видимую яркость. Они уменьшают усталость глаз в длительных сеансах.
Разрешение экрана
Разрешение определяет количество пикселей. Это влияет на ясность изображения. Обычные выборы 320× 240 для простых экранов и 1024× 600 для HD Sharp. Неправильное сопоставление вызывает растяжки. Болит точность прикосновения. Высокий как 1920× 1080 налог на Пи’ с GPU. Охлаждающие части помогают поддерживать скорость.
Совместимость с моделью Raspberry Pi
Наиболее важно тип ссылки. DSI/MIPI предоставляет встроенный соединение для быстрого прикосновения. HDMI подходит для любой настройки. AV или VGA соединяют старые устройства, но добавляют задержку. Способы монтажа - задние клипы, одинокие стенды или полные корпусы - должны соответствовать Pi’ с формы. Проверьте помощь водителя. Емкостные типы нуждаются в ядровых дополнениях для мульти-сенсорных устройств. Сопротивления этого не хватает.
Дополнительные точки охватывают углы зрения. IPS-панели превосходят TN для группового просмотра. Соотношение аспектов: 16:9 для видео, 4:3 для старых программ. Потребление энергии ниже 5 Вт соответствует аккумуляторной установке. Знаки RoHS соответствуют зеленым правилам. Уровни IP защищают пыль в полевых работах.
Как добавить сенсорный дисплей в свой Raspberry Pi?
Добавление сенсорного экрана поднимает Raspberry Pi от фиксированных моделей до живых экранов. Небольшие TFT ЖК-дисплеи открывают множество применений. Примерами являются пользовательские телефоны или экраны AR. Waveshare’ с 3,2-дюймовый модуль Spotpear показывает простой доступ. Он имеет сопротивляющий сенсорный слой с поддержкой ручки для точных входов.
Этот маленький экран стоит очень мало. Он соединяется через GPIO без дополнительных проводов. Он обрабатывает до 320× 240. Применение варьируется от передвижных кабин до встроенного износа. Пи’ s мощность работает в режиме реального времени рисунок.
Как работает добавление LCD сенсорного экрана?
Ссылка проста. Складка экрана’ с женские штифты на Raspberry Pi’ с GPIO. Это устанавливает разговор SPI или I2C. Не требуется сварка или дополнительные биты. Модуль извлекает энергию из доски. TFT использует сопротивляющую технологию для дешевого сенсорного чувства. Работает с перчатками.
Для 3,2-дюймового устройства Waveshare спецификации включают обновление 60 Гц и 262K цветов. Это яркие меню. Настройка драйвера когда-то означала восстановление ядра. Но готовые изображения Raspbian делают его быстрым. Они включают в себя сенсорную настройку и поворотные инструменты.
Настройка 3,2-дюймового сенсорного ЖК-дисплея Raspberry Pi с изображением ОС Raspbian
Пропуск ручного водителя. Готовые файлы ОС добавляют поддержку экрана с самого начала. Получить файл .IMG. У него есть правила SPI и сенсорные карты. Перенесите его на карту microSD.
Пользователи Windows выбирают Win32DiskImager. Вставьте SD карту. Выберите диск, например G:. Загрузите изображение. Начните писать. Права администратора обеспечивают полное разделение. После этого удалите сейф. Загрузите Pi. Экран загорается за секунды. Показывает рабочий стол с настроенным сенсором.
Шаги Linux используют dd:
sudo dd if=image.img of=/dev/sdX bs=4M статус=прогресс
Заменяйте правильное устройство. Проверьте загрузку и попробуйте многосенсорные движения. Подтвердите ссылку SPI в журналах dmesg.
Таким образом, изменения в config.txt пропускаются. Это дает готовую быструю конструкцию.
Часто задаваемые вопросы
Как яркость влияет на производительность дисплея Raspberry Pi?
Высшие ниты, такие как 400, сохраняют вид в ярких пятнах. Они перестают исчезать и сохраняют прикосновение в меняющемся свете.
Какое разрешение лучше всего для сенсорных ЖК-экранов Raspberry Pi?
320× 240 соответствует основным задачам. 1024× 600 или более дает четкие взгляды. Ему нужна большая мощность GPU.
Совместимы ли все модели Raspberry Pi с сенсорными ЖК-экранами?
Да, через DSI или HDMI. Старые модели могут нуждаться в монтажных исправлениях. Новые Pi 4/5 дают встроенную высокоскоростную помощь.
Какой метод установки самый простой для добавления сенсорного экрана?
GPIO стекинг с готовыми файлами Raspbian OS позволяет настроить плагин. Он пропускает неприятности водителя.
Расширите свою цепочку поставок с помощью дисплея Kadi: премьер-производитель и поставщик индивидуальных сенсорных экранов Raspberry Pi
Для партнеров, желающих больших, высококачественных ответов на экраны, Кади Дисплей — ведущий завод в Шэньчжэне — поставляет настроенные на заказ сенсорные модули TFT-LCD, настроенные для ссылок Raspberry Pi. С 10 000 ㎡ производственное пространство, сертификаты ISO9001/14001/13485/IATF16949 и навыки в интерфейсах DSI/MIPI, большие заказы получают быстрые модели, строгие тесты качества AOI и полную техническую помощь. Контакты sales@sz-kadi.com или 86-13662585086, чтобы поговорить о настройках OEM, оптовых затратах и гладком поставке для вашей небольшой линии систем. Повысить скорость создания — попросите котировку сейчас.
Предыдущий
TN vs IPS - в чем разница?
Следующая
Частые проблемы и методы устранения неполадок для встроенных модулей дисплея
Оставить комментарий

Последние блоги и новости
Блог и новости
-
 TN против IPS2024-7-9
 -
 TN против IPS2024-7-9