Getting Started with Raspberry Pi DSI Screens
Understanding Raspberry Pi DSI Technology
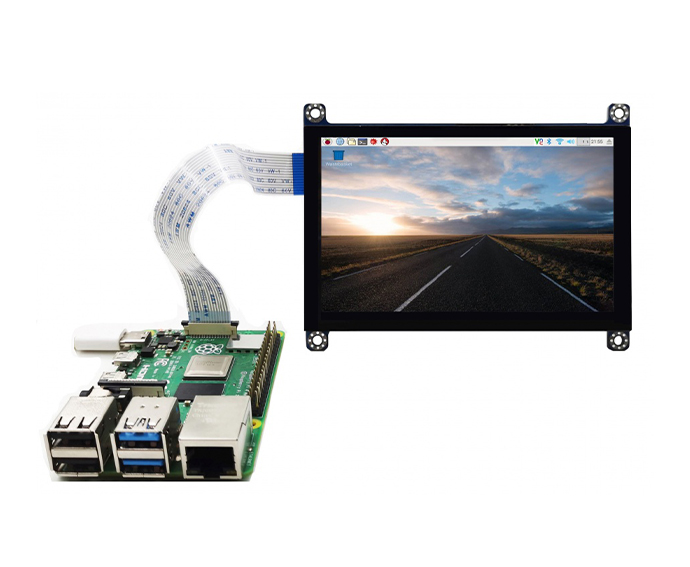
Raspberry Pi DSI screens utilize the Display Serial Interface (DSI) to connect directly to the Raspberry Pi board. This interface enables high-speed communication between the Raspberry Pi and the display, allowing for efficient data transfer and superior image quality. DSI screens are designed to provide a wide range of display resolutions and can support touch functionality, enhancing user interaction. Understanding the technical aspects of DSI technology is crucial for maximizing the performance of your display projects.
Benefits of Using DSI Screens with Raspberry Pi
Raspberry Pi DSI screens have a lot of advantages when it comes to using them in projects because they are lightweight options, for incorporating display technology into your work. These screens provide visuals. Can function with lower power consumption than other types of displays which makes them perfect for mobile applications. Additionally the touchscreen features, on DSI screens make user interactions more engaging and interactive which improves the experience.
Basic Requirements for Setting Up a DSI Screen
Setting up a Raspberry Pi DSI screen requires meeting some prerequisites. Start by having a Raspberry Pi board that’s compatible, with a DSI connector. The next step involves acquiring the DSI screen itself from options in the market, like those offered by KADI Display. Importantly make sure you have the essential software drivers and updates prepared for installation to ensure your screen works correctly.
Choosing the Right KADI Display Product for Your Needs
Overview of KADI Display ‘s Range of DSI Screens
Check out the selection of Raspberry Pi DSI screens, at KADI Display! They offer screens in sizes and resolutions to cater to project needs – from smaller screens for simpler projects to larger displays, for more intricate visual requirements.
Key Features of KADI Display Products
The screens of KADI Display DSI come with features that improve user-friendliness and performance effectively They offer high-resolution abilities for displaying sharp and vivid images that are perfect, for intricate tasks Many of these screens also come with touch capabilities to make the user experience more intuitive Besides the KADI Display products are crafted for easy connection setups and work well with Raspberry Pi making the installation process simpler.
How to Select the Appropriate Model
When choosing the DSI screen model from KADI Display company for your project requirements is crucial, for success. Take into account the size and clarity of the screen depending on how you plan to use it. Whether it’s for managing control systems displaying media content or enhancing user interactions. Additionally make sure to consider any functions, like touch screen functionality. In conclusion, matching the screen attributes with your project objectives will steer you in making the choice.
Setting Up Your Raspberry Pi DSI Screen
Preparing Your Raspberry Pi Board for Installation
Make sure your Raspberry Pi board is all set before you connect a Raspberry Pi DSI screen by turning off the device and making sure you have the software updates installed on it first. Also check out any instructions, from KADI Display to confirm compatibility and installation steps, for your chosen DSI screen. Preparing properly can prevent any problems when setting up the screen.
Connecting a KADI Display DSI Screen to Your Raspberry Pi
Attaching the Hardware Components
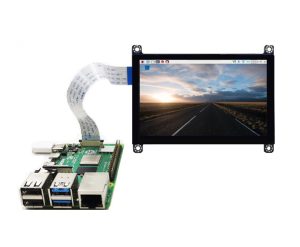
To link a KADI Display DSI screen to your Raspberry Pi you need to follow the steps first. Begin by aligning the DSI connector on the screen with the DSI port, on the Raspberry Pi board. Press down carefully to attach it firmly without using force. The effectiveness of these connections will significantly affect how well your display setup works overall.
Securing Connections Properly
After you’ve connected the hardware components make sure to double-check that all the connections are securely, in place to avoid any display problems and potential hardware issues down the line. It’s important to keep all the cables neatly arranged and free, from tension to prevent wear and tear over time. Managing your connections carefully will help prolong the life and reliability of your DSI screen setup.
Configuring Software for Optimal Performance
Necessary Software Updates and Packages
For the performance of your Raspberry Pi DSI screen make sure to install the software updates and packages by accessing the terminal on your Raspberry Pi and running update commands to get the latest software versions available! Enhancing display capabilities and responsiveness can be achieved by installing any drivers that are specifically designed for the KADI Display product.
Running Initial Setup Scripts
Once you’ve installed the required software on your KADI Display DSI screen setup and run any scripts provided with it to configure the display settings properly and fix any resolution or orientation issues that may arise initially; This step is crucial, for ensuring everything runs smoothly. Allows you to make the most of your screen.
Troubleshooting Common Issues
Screen Not Displaying Properly
Checking Hardware Connections
When the screen is acting up and not showing things right the initial thing to do is to inspect all the connections of the hardware. Make sure that the DSI cable is firmly connected, to both the Raspberry Pi and the DSI screen. Also, check for any pins or obvious damage that could be causing connection problems. A lot of display problems can usually be linked back, to these hardware errors.
Verifying Software Configuration
Once you’ve checked that all the hardware connections are, in place and secure the next thing to do is to confirm the software setup on your Raspberry Pi device. Take a look at the settings on your Raspberry Pi to see if it detects the DSI screen properly. Refer to the setup instructions, for your KADI Display model to make sure that you haven’t overlooked any steps during installation. By following this approach you can pinpoint whether any problems are related to hardware issues or software settings.
Adjusting Screen Resolution and Orientation
Methods to Change Screen Resolution
To improve the quality of your DSI screen, on the Raspberry Pi device screen resolution settings should be adjusted to access resolution options that cater to the specific requirements of the KADI Display screen being utilized This customization will enhance image quality and guarantee that your project appears as intended.
Rotating the Screen Display
In situations or scenarios, you might have to change the orientation of the screen display, on your device or gadget, for viewing experience or usability purposes. This can typically be done by adjusting the settings on a Raspberry Pi device based on your project requirements or preferences. Knowing how to handle screen rotation is a skill that can enhance your proficiency in utilizing the functionalities of a Raspberry Pi.
Maximizing the Use of Your Raspberry Pi DSI Screen
Utilizing Touchscreen Functionality (if applicable)
Enabling Touchscreen Features
If your KADI Display DSI screen has a feature, for use and you activate it accordingly as per the instructions provided in the documentation accompanying your screen display; this action can greatly improve user engagement and interaction with the device interface by enabling touch-based interactions, with software applications to create a more interactive user experience.
Calibrating Your Touchscreen
Ensuring the accuracy of the touchscreen through calibration is crucial, for enhancing user interaction in projects that heavily rely on touch input methods, in your Raspberry Pi ecosystem using software tools for this purpose.
Integrating Additional Peripherals
Adding Cameras or Sensors
To take your Raspberry Pi DSI screen projects to the next level you can enhance them by adding devices, like cameras or sensors. This expansion opens up opportunities for uses in fields from robotics, to smart home setups. Make sure all the required connections and software settings are properly set up to support these parts and create a system.
Connecting External Storage Solutions
You can also add storage options to your projects, for data management abilities. A USB drive or an external hard drive can be connected to the Raspberry Pi using its ports. Setting up these options correctly will make your work smoother. Enhance the features of your DSI screen apps.
Expanding Your Projects with KADI Display DSI Screens
Innovative Project Ideas Using DSI Screens
KADI Display DSI screens inspire creativity in project development by offering a range of applications. The flexibility of DSI screens enables their use, in tools and industrial control panels as well as home automation systems.
Leveraging Community Resources and Support
The Raspberry Pi community is rich with resources and support opportunities. Engaging with forums, online workshops, and social media groups can provide invaluable insights and ideas. Sharing your experiences and seeking advice from others can contribute toward more successful projects involving Raspberry Pi DSI screens. By leveraging the knowledge of the community, you can gain inspiration and assistance relevant to your DSI screen endeavors.


-300x250.jpg)

